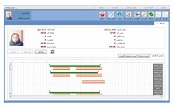
Below is a bird’s eye view of the web-based time and attendance software, sorted by menu partitions, which have been utterly described in details. Note that translated partitions are semibold. To access them, click on the highlighted links. In the next updates, we will explain the rest of them.
1. Definitions | 2. Executive Affairs |
3. Organizational Affairs | 4. Reports |
5. Help | |
Definitions in the time and attendance software
Working Calendar
A calendar is an entity for determining specific times and days. The calendar of time and attendance software specify official holidays, defined holidays in the settings section, and weekends in that organization.
How to access it? Definitions >> Calendar.
Figure 1 shows the form of a working calendar. A list of defined calendars and information of defined calendars of each organization, including calendar year, calendar title, and many workgroups that use this calendar, are displayed on the right side. By clicking on the calendar from this list, details of it will be displayed in the general view list on the left side. The holiday type is displayed in color specified in the holiday type section.
Figure 1- A list of the organizational working calendar.
New calendar
Click the new button to define a new calendar on the home page. A window such as a figure 2, will be opened with the following options, which will be created by entering new calendar information.
This form has three main sections:
- The first part is about calendar information. In this section, the general information of the calendar is determined.
- The second part is related to the general view of the calendar been produced. This view includes the months of one year on the right and whose days are at the top.
- The third part at the bottom of the form is relevant to the typical day and the types of holidays defined in the software. To define holidays, see Settings / Types of Holidays.
In the following, we will explain the mentioned cases in detail.
Figure 2- Defining a new work calendar and explaining the different parts of the form
- Calendar Name: In the textbox 1 of figure 3, enter a name for our calendar.
- Calendar Year: In the textbox 2 of figure 3, select a calendar year. The minimum value for the selection is 1331(Iranian year), or 1952.
- Organization Name: In the textbox 3 of figure 3, select the organization. If only one organization is defined in the software, it will be selected by default.
Figure 3- Calendar information
Weekend: choose the weekend of the organization from list No. 4 in Figure 4. Note that this list gives a possibility to select more than one option.
Figure 4 - Determining the organization's weekend
We can see a general view of the calendar been produced by completing the above options. To determine the other holidays of the organization, refer to the third section - typical day and other defined holidays. Operators can select any of these holidays according to the organization's performance and apply it to the calendar by clicking on the day. Figure 5 shows a view of the defined calendar. Click on the 'Save' button to register information.
Figure 5- A new calendar view in web time and attendance software
Edit calendar
To edit a work calendar, select the calendar from the list and click the "Edit" button. A window similar to figure 2 will be opened, which shows information about the calendar. In this window, we can change the available information to new values.
Delete calendar
To delete a calendar, click the "Delete" button. A warning message will be displayed, asking us to click the "Yes" button if you are sure you want to delete the calendar. Note that if the calendar is being used in the workgroup, it will not be possible to delete that calendar.
Refresh calendar
Use the "Refresh" button to receive new information.
Settings
By clicking the 'Settings' button, you will be transferred to the holiday type's definition.
Working Group
A working group provides a division to the operators. In this way, employees are classified into workgroups by their specialization or with the goal, which is they pursue. e.g., accounting, administrative, warehousing, and so forth. Note that employees in each workgroup have their calendars, rules, and work patterns.
How to access it? Definitions >> Working Group.
Figure 1 shows a list of the organization's working groups. If a multi-organization capability is purchased, the working groups will be listed separately by the organization. This list shows the name of the group, the number of active employees in that group, and the current calendar used.
Figure 1- The list of working groups in web time attendance software
New workgroup
To define a new workgroup, click the "New" button on the home screen. A window will open in Figure 2 with the following options, which will create a new working group by entering information. Enter the name of a workgroup in the textbox and select an organization. If one organization is defined in the software, it will be selected by default. Select the calendar of a new working group from the list, and if we need to write more information, use the "Description" box. We can apply the changes of new workgroup rules in the "Group Rules List" section. See By clicking the "Save" button, if the entered information is valid, a new workgroup will be saved, and we will return to the "Working Group" home page.
Figure 2- Definition of a new workgroup in the time attendance software
Edit a working group
To edit a workgroup, select a group and click the "Edit" button. A window similar to the defined in the working group (Figure 2) will open. Apply the changes such as the name of the working group and the necessary explanations, and click the "Save" button. Note that in the editing section, information about labor law does not apply to edit. To change the rules of working groups, go to "Change Rules."
Delete a working group
To delete a workgroup, select the group and click the "Delete" button. An alert message will be displayed, asking you to click the "Yes" button if you are sure to delete the working group. Note that it is not possible to remove a working group that is used in the system.
Settings
Click the "Settings" button, it leads you to the personnel laws.
Refresh
Use the "Refresh" button to receive new information.
Change calendar
As mentioned in the definition of a workgroup, each workgroup has a specific work calendar. The start date of the work calendar is set to the definition date of the workgroup. Use "Change Calendar" if you need to assign a new calendar or edit an existing calendar. Clicking on the "Change Calendar" button will open a window in Figure 3. This form includes workgroup information and work calendar allocation history. Note that the fields for selecting a work calendar and the start date of the assignment are disabled.
Figure 3- Change calendar in the web time and attendance software
Click the "New" button to assign a new work calendar to the workgroup (Figure 4 - right). By clicking the "New" button, the fields for selecting the calendar and the start date of the allocation will be activated. After selecting the work calendar and entering the start date, click on the "Save" button will save the allocation information.
Figure 4- Assigning a new calendar to the web time and attendance software
To edit a group calendar, select the calendar from the allocation history list and click the "Edit" button. After applying the changes, save the new information by clicking the "Register" button.
To delete a group calendar, select the calendar from the allocation history list and click the "Delete" button. A warning message will be displayed, asking you to click the "Yes" button if you are sure to delete it. According to Figure 5, after saving the information, the calendar allocation history will be updated and displayed.
Figure 5- Updating a work calendar allocation history in the web time attendance software
Change laws
As mentioned in the definition of a working group, each working group has its own set of work rules. The date of commencement of labor laws is determined by the date of the definition of a working group. Use "change rules" if you need to assign a new set of rules or edit existing rules.
Clicking the "Change Rules" button will open a window like Figure 6. This form contains information about the working group and the history of the allocation of labor law. By clicking on each row of the allocation date, a list of rules is displayed. Note that the start date of the allocation is inactive.
Figure 6- Changing the rules profile in the web presence and absence software
Click the "New" button to assign a new labor law to the working groups. By clicking on the "New" button, the field to the start date of the work law set will be activated. Now click the "Review" button to display the list of rules that can be edited. According to Figure 7, after editing the set of work rules, the allocation information will be saved by clicking the "Save" button.
Figure 7- Determining the profile of the new law in the web time and attendance software
To edit group rules, select a rule from the list of allocation history and click the "Edit" button. After applying changes, save the new information by clicking the "Save" button.
To delete a group profile, select the rules profile from the allocation history list and click the "Delete" button. A warning message will be displayed, asking us to click the "Yes" button if you are sure to delete the profile of the group's rules.
Working Pattern
Personnel
Operators
The operators of the time attendance software are working group operators, working place operators, and a manager. These operators can access software information according to the role and level of access specified. To see a list of guides and edit information, refer to the operator's section.
How to access it? Definitions >> Operators.
Figure 1 shows a form of operators. The list of operators - on the right side - shows information of the defined operators, which is including the type of operator and the number of employees in each operator type. By clicking on the type of operator from this list, the details of employees will be displayed in the list of operator type employees, which is on the left side. The information listed in this form depends on the level of access and the level of mastery.
Figure 1- List of operators
Refresh Operators
Use the "Refresh" button to receive new information.
Edit Operator
Click the "Edit" button on the main page to edit the operator type or view the operator's details. A window opens in Figure 2, which shows the person's information and further information about the type of operator. An access level, type of operator, and operator's target are editable in this form. Depending on the type of selected operators, a list of leadership goals is displayed. This list allows us to select more than one operator. After applying changes, the new information will be saved by clicking the "Save" button.
Figure 2. Operator specifications
Change Password
To change the operator's password, select an operator from the "Operators list" and click the "Change Password" button. According to Figure 3, the "Password Rewriting" form will open, which will be overwritten operator's national code by clicking on the "Password" button. We can also use the "Advanced Search" button to select the personnel.
Figure 3- Rewriting password


